NEST Installation Instructions
Standard Installation Instructions
These installation instructions should work for most users, who do not need custom configurations for their systems. If you want to compile NEST from source, see section Advanced Installation Instructions.
Install NEST via the PPA repository.
Add the PPA repository for NEST and update apt:
sudo add-apt-repository ppa:nest-simulator/nest
sudo apt-get update
Install NEST:
sudo apt-get install nest
The NeuroFedora team has generously provided the latest
versions of NEST on their platform. As that is available in the
standard Fedora platform repositories, it can simply be
installed using dnf:
sudo dnf install python3-nest
Find out more on the NeuroFedora site: https://docs.fedoraproject.org/en-US/neurofedora/nest/.
Create your conda environment and install NEST. We recommend that you create a dedicated environment for NEST, which should ensure there are no conflicts with previously installed packages.
We strongly recommend that you install all programs you’ll need, (such as
ipythonorjupyter-lab) in the environment (ENVNAME) at the same time, by appending them to the command below.Installing packages later may override previously installed dependencies and potentially break packages! See managing environments in the Conda documentation for more information.
Without OpenMPI:
conda create --name ENVNAME -c conda-forge nest-simulator
With OpenMPI:
conda create --name ENVNAME -c conda-forge nest-simulator=*=mpi_openmpi*
The syntax for this install follows the pattern:
nest-simulator=<version>=<build_string>Activate your environment:
conda activate ENVNAME
In addition to native installations from ready-made packages, we provide containerized versions of NEST in several formats:
Docker provides an isolated container to run applications. The NEST Docker container includes a complete install of NEST and is set up so you can create, modify, and run Juptyer Notebooks and save them on your host machine. (See the Note below for alternative ways to use the Docker container.)
If you do not have Docker installed, follow the Docker installation instructions for your system here: https://docs.docker.com/install/.
If you are using Linux, we strongly recommend you also create a Docker group to manage Docker as a non-root user. See instructions on the Docker website: https://docs.docker.com/install/linux/linux-postinstall/
Create a directory or change into a directory that you want to use for your Jupyter Notebooks.
mkdir my_nest_scripts
cd my_nest_scripts
Run the Docker container. Replace the
<version>with one of the latest NEST versions (e.g.,2.20.0) or uselatestfor the most recent build from the source code.
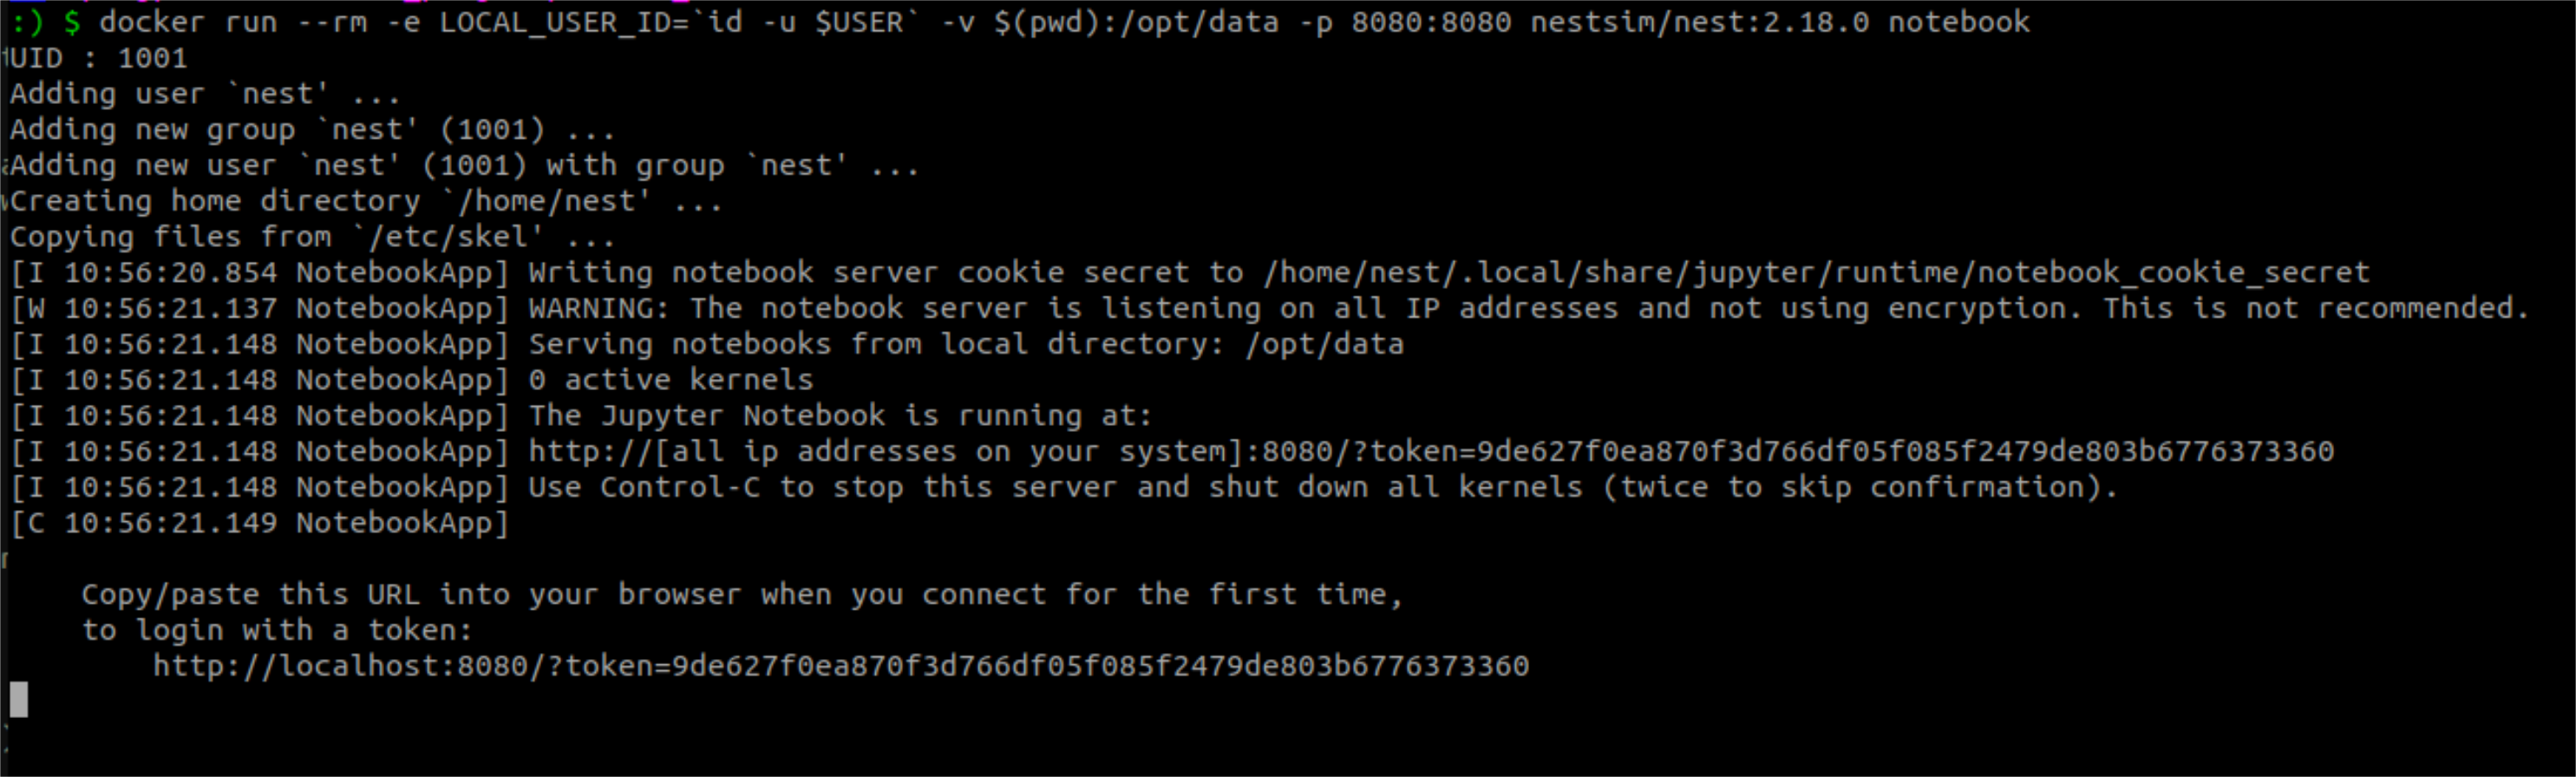
docker run --rm -e LOCAL_USER_ID=`id -u $USER` -v $(pwd):/opt/data -p 8080:8080 nestsim/nest:<version> notebook
Once completed, a link to a Jupyter Notebook will be generated, as shown below. You can then copy and paste the link into your browser.
You can now use the Jupyter Notebook as you normally would. Anything saved in the Notebook will be placed in the directory you started the Notebook from.
You can shutdown the Notebook in the terminal by typing Ctrl-c twice. Once the Notebook is shutdown the container running NEST is removed.
Note
You can check for updates to the Docker build by typing:
docker pull nestsim/nest:<version>
Note
You can also create an instance of a terminal within the container itself and, for example, run Python scripts.
docker run --rm -it -e LOCAL_USER_ID=`id -u $USER` -v $(pwd):/opt/data -p 8080:8080 nestsim/nest:<version> /bin/bash
See the README to find out more, but note some functionality, such as DISPLAY, will not be available.
We have live media (.ova) if you want to run NEST in a virtual machine. This option is suitable for Windows users, since we don’t support NEST natively on Windows,
Download the live media here, and follow the instructions to set up the virutal machine .
Once NEST is installed, you can run it in Python, IPython, or Jupyter Notebook
For example, in the terminal type:
python
Once in Python you can type:
import nest
Note
If you get ImportError: No module named nest after running python. Try to run python3 instead.
or as a stand alone application:
nest
If installation was successful, you should see the NEST splash screen in the terminal:
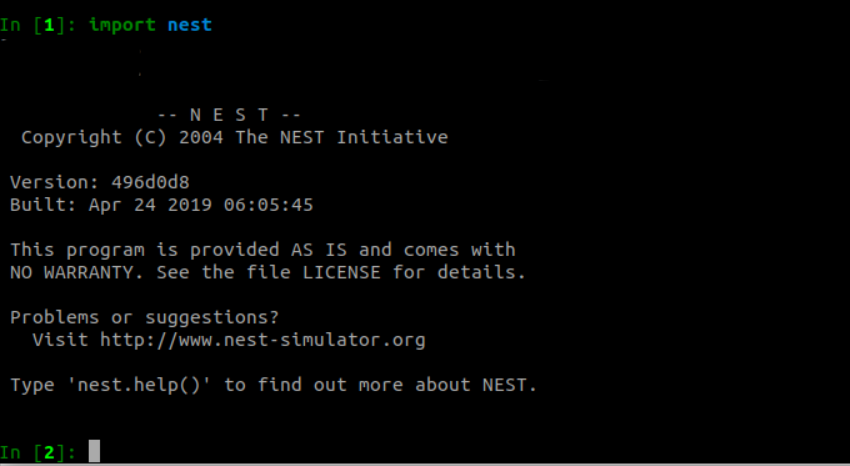
Installation is now complete!
Now we can start creating simulations!
If installation didn’t work, see the troubleshooting section.
See also
Advanced Installation Instructions
If you need special configuration options or want to compile NEST yourself, follow these instructions.
Download the source code for the current release.
Follow instructions for Ubuntu/Debian Installation and take a look at our Configuration Options.
Get the latest developer version on GitHub. Fork NEST into your GitHub repository (see details on GitHub workflows here).
For further options on installing NEST on macOS, see mac_manual for Macs.
Instructions for high performance computers provides some instructions for certain machines. Please contact us if you need help with your system.
Note
Installation instructions for NEST 2.10 and earlier are provided here, but we strongly encourage all our users to stay up-to-date with most recent version of NEST. We cannot support out-dated versions.